Configure Your Hardware with the NECTO's Setups Wizard Easily
The Setups Wizard in NECTO Studio makes it easy to create hardware configurations for your embedded applications. Whether you’re just getting started or need to fine-tune advanced settings, this tool guides you through the entire process.
Let’s walk through a practical example step-by-step — and remember, there’s a Guided Tour available! Just head to the Help menu and select Start Guided Tour for an interactive walkthrough.
🚀 Step-by-Step Guide to Creating a New Setup
📌 Reference Image: 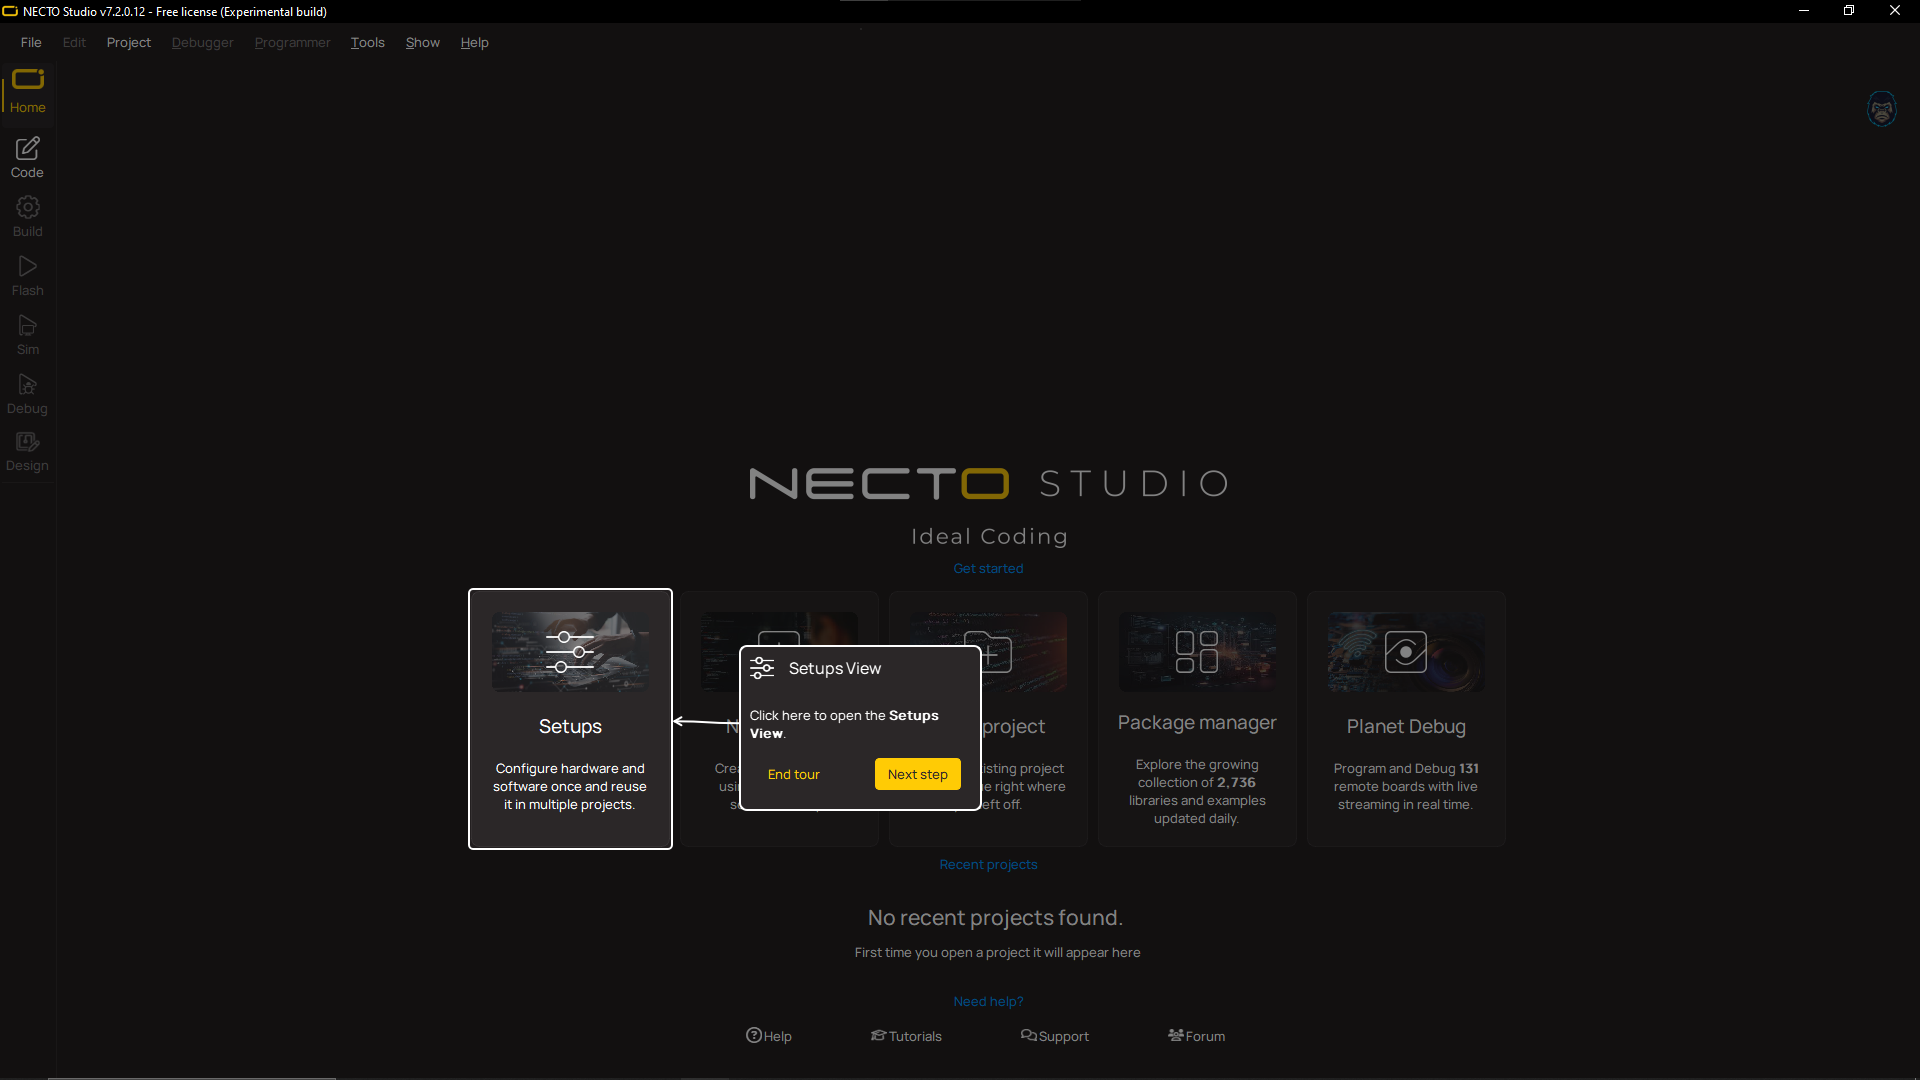
-
Run NECTO Studio: Ensure NECTO Studio is installed and launched.
-
Navigate to the Home Page: If you’re not already on the home screen, click the NECTO icon at the top left.
-
Open the Setups View: On the left-hand side, click Setups to access the Setups View.
-
Start a New Setup: Click New to launch the New Setup Wizard. (If this is your first time using NECTO, your setups list may be empty.)
-
Choose a Compiler: This step defines how your code will be compiled and built for your hardware. NECTO Studio supports a wide range of toolchains, so choose the one that best fits your project.
Supported Compilers/Toolchains:
- **GCC for ARM**
- **GCC for RISC-V**
- **Clang for ARM**
- **Clang for RISC-V**
- **Microchip XC32, XC16, XC8**
- **MikroC AI** for ARM, AVR, dsPIC, PIC, PIC32
Advanced Compiler Settings: Click the Advanced button next to your selected compiler to fine-tune:
- **Debugger Options:** Choose between **LLDB** or **GDB**.
- **Library Options:** Select either **mikroSDK** (recommended for streamlined development with Click boards™) or **Bare Metal** (if you prefer full manual control over your code).
Example Selection: For this walkthrough, choose GCC for ARM with the following advanced settings:
- **Debugger:** GDB
- **Library:** mikroSDK

Once your compiler and settings are selected, click **Next** to proceed to board selection.
- Select a Board: In this step, you’ll choose the development board that serves as the foundation for your embedded project. NECTO Studio supports a variety of boards, from starter kits to advanced development systems, making it easy to find the perfect fit for your setup.
Board Categories: You can select from several categories of supported hardware: - Starter Boards — Ideal for learning and simple prototypes. - Development Systems — Versatile boards with multiple mikroBUS™ sockets, like UNI-DS v8. - mikromedia Devices — Compact, multimedia-focused boards with built-in displays. - Evaluation Kits — Specialized boards designed for testing and evaluating specific microcontrollers or peripherals.
Add New Board (Optional): If your board isn’t listed, you can create a custom board profile
- Board Image: Upload an image of your board (optional, but useful for visual reference).
- Board Name: Enter a recognizable name for your board.
- Select SDK: Choose the software development kit (e.g., mikroSDK or Bare Metal).
- Select MCU: Pick the microcontroller your board uses.
- Configure mikroBUS Pin Mapping: If your board includes mikroBUS sockets, map the pins (e.g.,
mikroBUS1_1_AN → PA0).
Example Selection: For this tutorial, let’s keep it simple:
 - Choose **UNI-DS v8** (a versatile development system with multiple mikroBUS sockets).
 - Click **Next** to proceed to MCU selection.
-
Choose an MCU: The wizard auto-selects the MCU based on the board.
- Pick STM32F407ZG.
- Use the Advanced option to configure clock settings if needed.
-
Select a Display Board:
- Choose a compatible display board or select No Display to keep things simple.
-
Programmer & Debugger Selection
- If using Planet Debug, CODEGRIP WiFi is auto-selected (ideal for remote hardware access).
- If you have a physical CODEGRIP device, NECTO will scan and connect automatically.
-
Finish the Setup Wizard: Click Finish in the top right corner. NECTO will check for any missing packages and complete the setup installation.
🛠️ Your Setup is Ready!
Once the installation finishes, your new setup is ready to use! You can now:
- Write and debug code tailored to your hardware configuration
- Access mikroSDK libraries for streamlined development
- Connect to Planet Debug for remote development & testing
The Setups Wizard ensures your hardware and software work seamlessly together — whether you’re using a board on your desk or remotely through Planet Debug.